If your water heater has stopped working, it may be unable to get a temperature reading, but if so, do you know how to replace a water heater thermostat? If not, then you're in the right place. Before you buy a new replacement part, you want to make sure you test your existing thermostats. If the thermostats aren't the problem, replacing them is a waste of time and money. These instructions are for electric water heaters.
If you have a gas water heater, replacing the thermostat means you are replacing the entire gas control valve.
How to Test a Water Heater Thermostat

Most electric water heaters have two thermostats, and one or both may be the problem. Keep in mind that the upper thermostat supplies voltage to the lower. Here is how you determine what to replace:
- Switch the water heater's power off.
- Remove the access panels and insulation so you can access the thermostats/elements.
- Using a screwdriver, set the upper thermostat on high, and the lower thermostat on low, by turning the dial in the middle. Turn clockwise for a higher temperature, and counter-clockwise for lower temps.
- Turn the power back on.
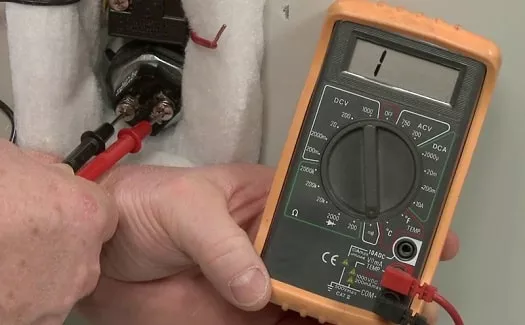
- Using a multimeter (try the UEI UTL33T digital multimeter), check the wires above the reset button on the thermostat to verify that they are reading 240v.
- Now, check for power on terminal screws on the upper element. If there is no power, this thermostat needs replacement. If you do find there is power, then test the lower thermostat.
- Set the lower thermostat on high with the upper thermostat at low. Again, make sure there is voltage, this time to the lower element.
- If there is voltage and the water heats up, then the lower thermostat is probably in good shape. Lower the temperature, and you should hear a clicking sound from your water heater. That's your thermostat working.
- If no voltage, then test the lower thermostat by touching the multimeter to the top contact screw with one probe, and with the other probe, touch the metal of the tank. If you do not get a reading, you need to replace the upper thermostat. If you get 120v, then you know the upper thermostat is fine. Take the probe off the top contact screw and touch it to the lower contact screw while still touching the tank with the other probe. If you get 120v, it's okay. If you get nothing, it needs replacement.
Replacing a Water Heater Thermostat in 8 Steps

Remember, this is for electric water heaters:
- Safety first, cut the power off at the breaker.
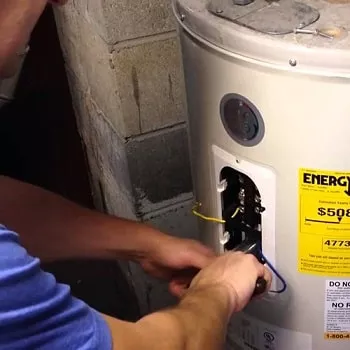
- Remove the access panel(s) and insulation so you can access the thermostat(s). You may have one or two access panels. Most water heaters have two elements/thermostats.
- Use the voltage meter to make sure the power is completely off.
- Take a picture of the wiring within each panel so you can reference it later when you're putting everything back together.
- Remove the wiring from the thermostat.
- You need to remove the entire bracket that holds the thermostat in place. Pry out each side one at a time using a twisting motion, but be gentle. Don't force it, or you can break it. You don't want to have to replace that part too, so take your time with this step and get it right.
- Slide the new thermostat into the bracket, slide the bracket back into place, and replace the wiring.
- Turn the power back on and allow time for your tank to heat up.
Enjoy Your Newly Working Water Heater
Any home improvement novice can handle this project, but that doesn't mean you want to. Call a professional if this seems like too much for you. If you found this article helpful, please share it online with your friends. PlumbersStock carries trusted names like Bradford White. If you need a new water heater, then you are in the right place. If you need more information about water heaters, check out our help resources or read this Wiki article.
Related resources:
How to Replace a Thermocouple
Testing a Water Heater Element
How to Change a Water Heater Element
How to Clean a Thermocouple
T&P Valve Keeps Opening
How to Replace a T&P Valve
How to Fix a Leaking Water Heater


