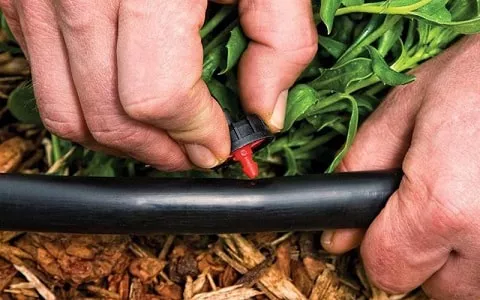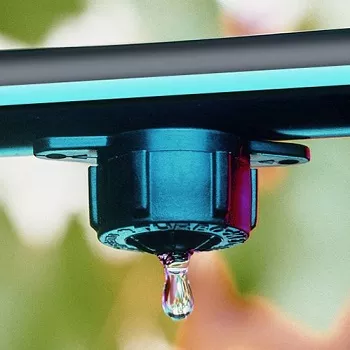
Drip irrigation supplies are a trendy way to water plants and bushes. It conserves water while keeping weeds and disease away. It's easy to install and easy to use. Drip systems will save you money on your water bill and keep your plants adequately fed. If you want to know how to install drip irrigation in conjunction with your sprinkler system, follow these steps:
Determine Where You Will Be Installing Drip Irrigation
Many people use a drip system for their flower beds, shrubs, and gardens, while they use a traditional sprinkler system for their grassy areas. Before you can look any further into a drip system for your home, you need to decide on which areas of the yard are better served by a drip system.
Choose Your Water Source
There are many ways you can install a drip system. You can use a hose, an outdoor nozzle, or even your irrigation water. Once you decide what type of water source you will be using, you will have a better idea of how to design it. If you can manage with a timer, we highly recommend that for convenience and effectiveness.
Draw Up Your Plan
Your design might make sense in your head, but I recommend putting it down on paper. A map is a perfect way to see how many parts you need and set up your system. You should set up your system so that every plant gets its drip emitter. Plants that require more water should get at least two emitters hooked up to them. If you need help setting up the design of your drip system, you can always seek help from a professional by calling our customer support team. This will help you make sure you are doing everything correctly.
Gather and Assemble Drip Irrigation Supplies
To prepare your list of parts, familiarize yourself with at least the basics:
Once you have drawn up your parts list and figured out exactly what you need, you can purchase your parts and begin your assembly. Putting a drip system together is fairly easy and can be done by even just a beginner.

- Before attaching any hose lines, connect the vacuum breaker and pressure regulator to the hose sill cock (spigot, hose bib). Connecting these hose fittings is essential because this will stop contaminated water from back-washing into the water supply lines within the home.
- To begin your installation cut your 1/4″ (1/2” is common as well) tubing with your cutters and then push the ends into the connectors.
- Connect your 1/8″ emitter lines to your main lines and emitters. Depending on how big your space is, you will repeat this process repeatedly. (Note: Make sure to draw up a plan before you start cutting. It will save a lot of time and hassle if all of the measurements are done correctly before you start.)
- Layout the Emitter lines as you connect them into the desired locations. Remember that you want your emitter lines to feed water to your shrubs, trees, and plant beds. This will help you to make sure to get every area covered as the lines are laid down. Plastic stakes can be purchased and help secure the lines where you want them without shifting.
- Before capping off the end of your irrigation line, leave it open so that you can flush all of the tubing. This will allow any debris in the lines to be removed before getting stuck later.
- You can now cover up your lines with mulch or rock. In some areas with dense vegetation, there is no need for the lines to be covered. Make sure not to pinch or crush any of the lines so that the water will flow/drip smoothly through them.
A few quick notes!
- Each manufacturer has parts that fit together perfectly. It is wise to use parts from the same manufacturer if possible throughout your whole irrigation system.
- It is also important to be aware of the different types of tubing. i.e., soak, perforated and non-perforated. Ensure that you have tubing that will allow the water to drip out into the vegetation. If you choose to use non-perforated tubing, you will need a hole punch to make your holes. Spacing each hole about 18 inches apart should do the trick.
- Try to keep each of the emitter lines about 12 inches apart. This will eliminate overwatering.
If you need help in this process, a professional would be happy to answer any questions.
Connect Your System to the Water Source and Test it Out
Once you have installed all of your tubing together, you can hook it up to the water source and try. This is the most exciting part. Once you get your system hooked up, you can begin watering your plants the way you should have been all along. Installing drip irrigation is a straightforward process worth every step. If you think about installing one of these great systems in your yard, you should check it out. Now that you know how to install drip irrigation, it's time to put down the laptop and get to work! Learn more basics about drip irrigation at Wikipedia.
Related Resources:
Why Choose Drip Irrigation?
List of Drip Irrigation Parts
Planning a Sprinkler Installation


