Many homeowners know how to manage a sprinkler system, but they are inexperienced when it comes to knowing how to plan a sprinkler system installation. When you are planning it out, it is a good idea to factor in a few things that can affect the overall performance. Below is a list of eight sprinkler design elements that are both important and often overlooked. You should consider, or at least be aware of these considerations, to help make the most of your sprinkler designing efforts.
Planning a Sprinkler Installation
Before we get into the details, did you know that you can have a PlumbersStock professional create a free sprinkler design for you? Lean on the experts and avoid the learning curve and all this planning.
1 - Potable vs. Reclaimed Water
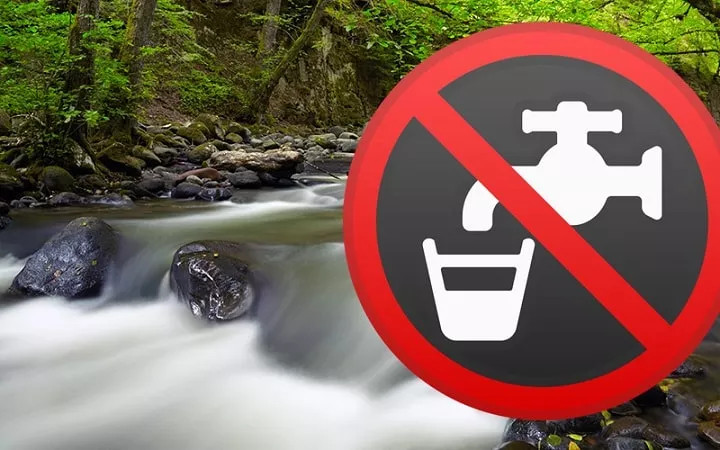
Reclaimed water is wastewater that is often used as a replacement for potable water for irrigation and industrial needs. Another term for reclaimed water is non-potable. This is a term used for water that has not been examined, treated, and is not approved by appropriate authorities as being safe for consumption. Knowing which water source you are using will help to determine which products to use. If you ever come across a sprinkler box or even a sprinkler itself with a purple/pink lid, do NOT drink from that water source. It is signifying a non-potable irrigation system. Reclaimed water is commonly used in municipal applications, like golf courses (this is why you are told not to stick a tee in your mouth). Recycled irrigation systems are becoming more popular as freshwater sources diminish.
2 - Water Source Size
Knowing the size of the pipe that is feeding your sprinkler system is crucial to the design of your sprinkler system. This one factor will determine a lot about how many sprinklers can run at one time and what size pipe to use for each zone. The easiest way to know the pipe size* is to look at the label. Most types of pipe include the size, type and sometimes even the pressure rating multiple times down the length of the pipe. After locating your water line, expose about 10-12” and wash it off with water. If there are no numbers or words visible, try one of the following.
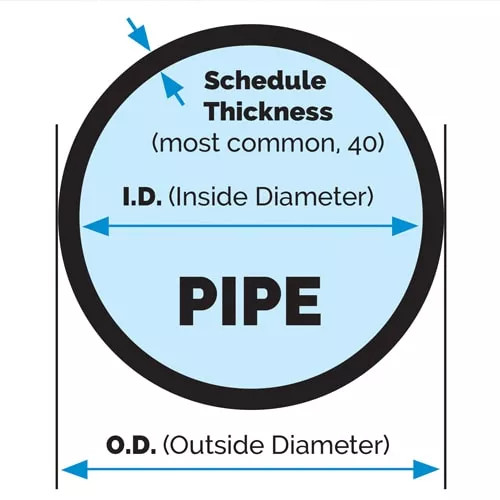
- The direct diameter measurement is the easiest. If possible, measure at the end of the pipe and measure the inside dimension using a tape measure or ruler. 1” inside Diameter = 1” pipe even though the outside diameter may be closer to 1-3/8”.
- Find the outside circumference of the pipe by wrapping a piece of paper around the outside of the pipe. Mark where it overlaps, then remove the paper and measuring its length (in inches) from tick mark to tick mark. Compare your measurement to the numbers in the charts below and find the corresponding pipe size.
*Note: The inch measurements below are approximate numbers but should be quite close to what you find when you do the measurement yourself.
- 2.75″ (70mm) = 3/4″ pipe
- 3.53″ (90mm) = 1″ pipe
- 4.32″ (110mm) = 1 1/4″ pipe
- 5.10″ (130mm) = 1 1/2″ pipe
For Steel Pipe or PVC Pipe:
- 3.25″ (83mm) = 3/4″ pipe
- 4.00″(102mm) = 1″ pipe
- 5.00″(127mm) = 1 1/4″ pipe
- 6.00″(152mm) = 1 1/2″ pipe
For Flexible Polyethylene Pipe (Tuff Tube):
- 2.96-3.33″ (75-85mm) = 3/4″ pipe
- 3.74-4.24″ (95-108mm) = 1″ pipe
- 4.90-5.57″ (124-141mm) = 1 1/4″ pipe
- 5.70-6.28″ (145-160mm) = 1 1/2″ pipe
*Pipe size and tubing size are measured differently. Tubing is measured by the outside diameter, while the pipe is measured by the inside diameter. To find the tubing size, simply measure the diameter (not the circumference). If the diameter is 1-1/2” you have 1-1/2” tubing.
3 - Pipe Type
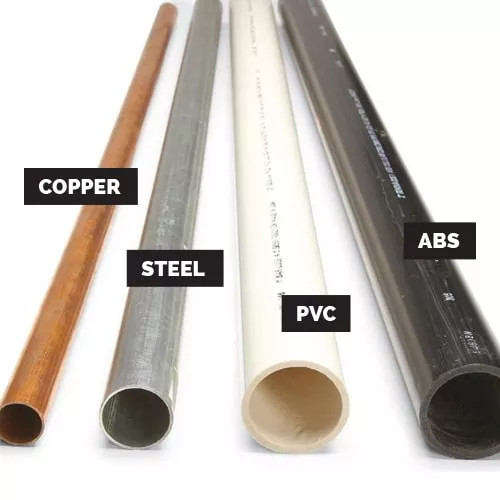
I am sure you noticed that there are different pipe styles on the chart above. That is because there is no single type of pipe used when supplying a home or an irrigation system with water. The type of pipe also plays a role In factoring pressure and water flow/volume. So It is a good idea to find out, not only what size the pipe is, but what type it is as well. There are generally five types of water supply lines that are used here in the USA today:
Copper Pipe
There are two basic types of copper tubing, soft copper, and rigid copper. Rigid copper is the most popular copper choice for water lines. Copper is orange in color and is rigid meaning it is not flexible.
PVC Pipe
PVC pipe is the most common pipe currently being used for sprinkler systems today. PVC’s strength, durability, easy installation, and low cost have made it one of the most widely used plastics in the world. It is white and is very rigid (meaning it is not flexible). PVC pipe and fittings usually come in white or dark gray. (dark grey signifies “Schedule 80” pipe) There are different classes/schedules of PVC pipe used for sprinklers. Class 200 is the least expensive and also the least durable. Schedule 40 is the most common as it is durable and fairly inexpensive with the ability to hold up under pressure. Schedule 80 is the strongest, can hold the most PSI, and is consequently the most expensive.
PEX Pipe
It is becoming more and more common these days to replace copper (in plumbing applications) with PEX pipe. All PEX pipe is manufactured with its specifications listed directly on the pipe. It too is white but while still firm is less rigid than PVC.
Galvanized pipe
Galvanized pipes are steel pipes that have been dipped in a protective zinc coating to prevent corrosion and rust. They are grey/nickel in color and are rigid and hard.
Tuff Tube
Tuff tube is a form of polyethylene tubing that is often used for larger applications that often require a longer distance of tubing lines/runs. It is usually blue and is somewhat stiff, but bendable.
If you can’t tell by looking at your pipes, there is a quick test to identify what kind of pipe you have. Grab a flat head screwdriver and a strong magnet. After locating your water line, scratch the outside of the pipe with the screwdriver:
- If it is copper, the scratched area will look like a copper penny, and a magnet will NOT stick to it.
- If it is PVC or PEX, the scratched area will appear ivory or white, and again, a magnet will NOT stick to it.
- If it is Galvanized Pipe, the scratched area will have a silver/metallic gray color, and a strong magnet will indeed stick to it.
- If it is Tuff Tube, the scratched area will blue or black in color and magnet will NOT stick to it either.
4 - Pressure and Flow Rate
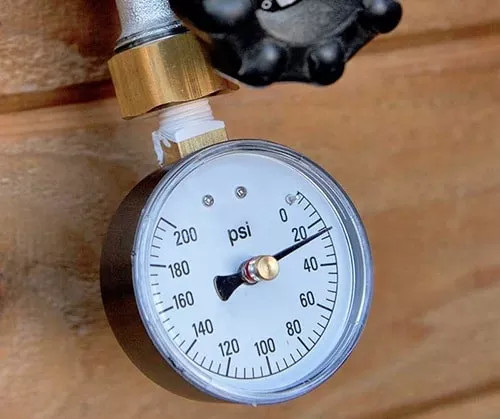
Two major factors to consider when designing sprinkler systems are; the available pressure and the flow rate. Designing a sprinkler system without these two important numbers factored in will severely affect the efficiency of your sprinkler system.
To determine the flow rate, find a bucket and fill it up. 😊 Using a hose bib (located on the outside of the house) fill a bucket, that you know the size of, to the top and time how long it takes to do so. Using the following formula you can easily determine the flow rate available.
*Don’t use a hose. It may restrict the flow and change the outcome.
Finding the pressure is just as easy but will require the use of a pressure gauge. Simply attach the pressure gauge to the hose bib and turn on the water. Once the needle on the gauge stops you will be able to read the pressure available.
*Make sure that no other water is running in the system. That includes toilets, faucets, and hoses. If you don’t have access to one, you can find one for cheap here.
5 - Sprinkler Type
Sprinklers are sold in a wide variety of sizes, styles, and spray patterns, and there are pros and cons to each one. Smaller areas of landscaping thrive best with pop-up spray heads, while you can utilize fewer rotor (gear driven) pop-up sprinklers in large areas. Impact sprinklers are another option when using a secondary water supply that may not be a clean as a culinary supply.
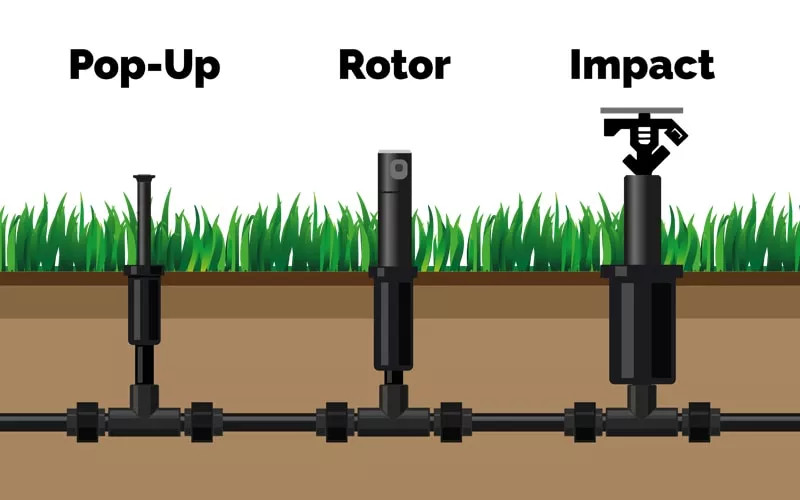
- Pop-up spray head sprinklers are located in the ground, and when this sprinkler head is activated (water pressure is applied), the upper portion rises into position to emit the spray of water. They are wider in the ground than what you see when they pop up and come in various pop-up heights, 2” 3” 4” 6” and 12”. A pop-up sprinkler has individual nozzles that vary the spray pattern and distance it sprays(throws). An 8’ quarter nozzle will spray a constant water pattern at a 90-degree angle for 8’. Pop-up sprinklers are best used in smaller lawn sections.
- Rotors or gear driven sprinklers are also located in the ground, and when this sprinkler head is activated (water pressure is applied), the upper portion also rises into position to emit a stream of water. The difference in the rotor sprinkler and a pop-up are threefold: (1) Rotors generally emit a higher flow rate than a pop-up spray head and throw the water farther. (2) A gear driven sprinkler rotates a stream of water across a large distance rather than a continual spray. (3) Rotor pop-up sprinklers can be adjusted to spray the pattern desired, whether that desired spray is 90-degree, 360-degree, or somewhere in between.
- An impact sprinkler is an irrigation sprinkler that distributes water from a small attached nozzle on the sprinkler head. A ratchet gear drives the spray head in a circular motion using the force of the outgoing water. The arc and throw of an impact sprinkler can be adjusted on the sprinkler head as can the direction. There are some impact sprinklers that are buried in the ground, but they can also be above ground. Impact sprinklers distribute a lot of water through a relatively large nozzle making them the ideal choice for water that is not filtered or that is sandy, like from a well.
6 - Elevation drop
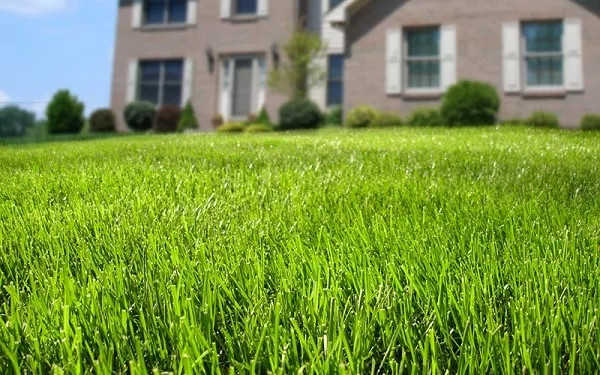
Elevation changes disrupt or even add water pressure to a water system. Elevation drop is a serious factor to consider when designing a sprinkler system and can change how well the system works. Each foot of elevation change is equal to 0.433 PSI of water pressure. You may have experienced this already in your life if by chance you have ever swum to the bottom of a pool or lake. For every 2’ that you descend, there is an additional 1lb (approximately) of pressure pushing against you. That is why your ears hurt and why divers have to “equalize” as the plummet to unknown depths and have to do it all over again n their way back up. Knowing how far below or above the water source a sprinkler will be will better help us determine the best products and design needed for each sprinkler system.
7 - Outdoor vs. Indoor Timers
In order to automatically run a sprinkler zone (a zone is a specific set of sprinklers designed to water at the same time), a sprinkler timer or clock is needed to be the “brains” of the operation. There are two types of residential sprinkler timers: indoor and outdoor. Outdoor timers are weather-resistant, less susceptible to UV rays and are usually very durable. Typically, they need to be hard-wired for power rather than simply being plugged into a 110-volt outlet. Indoor timers are not weather-resistant but do not need to be hard-wired.
It is never a good idea to install an indoor timer outside. Indoor timers usually include an external transformer as part of the plug that converts the standard 110V normally found in an outlet, to the 18 volts needed for the timer. Many people like to install their indoor timers in their garage, under a covered patio, in a shed or pump house, and sometimes even in a closet. Convenient locations like these are often preferred by users because they can remain indoors to program, reset, or turn the timer off or on.
It is fairly common for outdoor controllers to be converted for indoor use (with the additional purchase of a pigtail - three-pronged plug and power cord) because many outdoor timers have more features than indoor ones.
8 - To Use or Not to Use a Filter
Most systems would benefit from irrigation filters (also known as sediment filters). These filters keep sprinklers and the other parts of irrigation systems free of the contaminants that degrade performance and efficiency. It is recommended to add filters to systems that utilize rotors, sprays or drip devices because they are the most affected by dirt and debris. Some filters come in kits like in the image above, while others can be installed separately. There are filters that are clear so you can see when it is time to change them and even filters the can accept fertilizing tablets that feed your lawn each time the sprinklers turn on.
As you can see, there are a lot of things to consider when installing or formulating a sprinkler system design. But don’t let that stop you. An automatic sprinkler system is worth its weight in gold, especially if you plan on leaving your home for a few days at a time this summer. No more dragging a hose around, and no need to hire the inconsistent neighbor kid to do it for you while you are gone. If you do your homework, installing a sprinkler system correctly is a great way to increase the value of your home AND the curb appeal too. Something both you and your neighbors can appreciate for years to come!
If you want remote control of your sprinkler system from anywhere, check out the Rain Bird LNK WiFi Module.
Related Resources:
How to Design a Sprinkler System
Setting Up Sprinkler Zones
List of Sprinkler System Parts
The Best Pumps for Sprinkler Systems
All About Antisiphon Valves
When Should You Water Your Lawn?


